FatCow Plan for $3.15/mo. only

10 November 2016

Joomla Advanced - Website Backup

In this chapter, we will study about Website backup in Joomla. It allows backup of files, folders and re-opens it in Joomla.

Website Backup

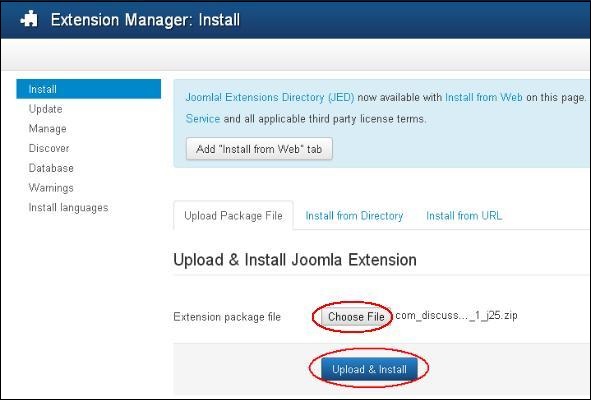
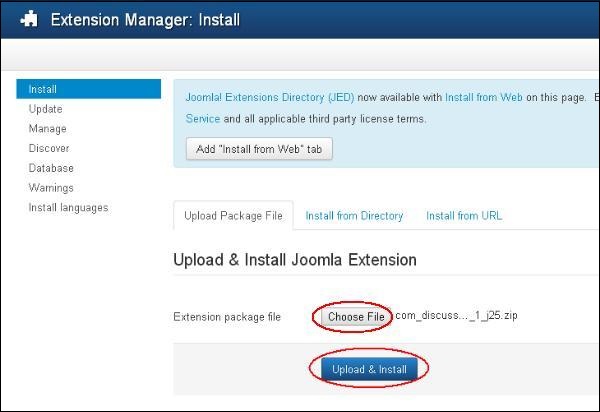
Following are the simple steps used to backup the website in Joomla −
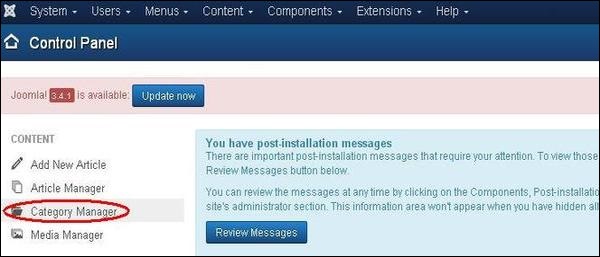
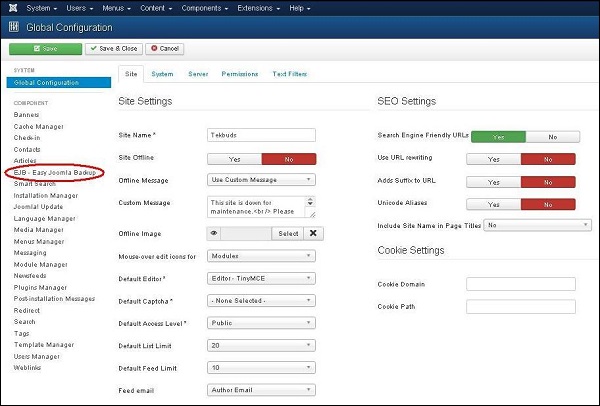
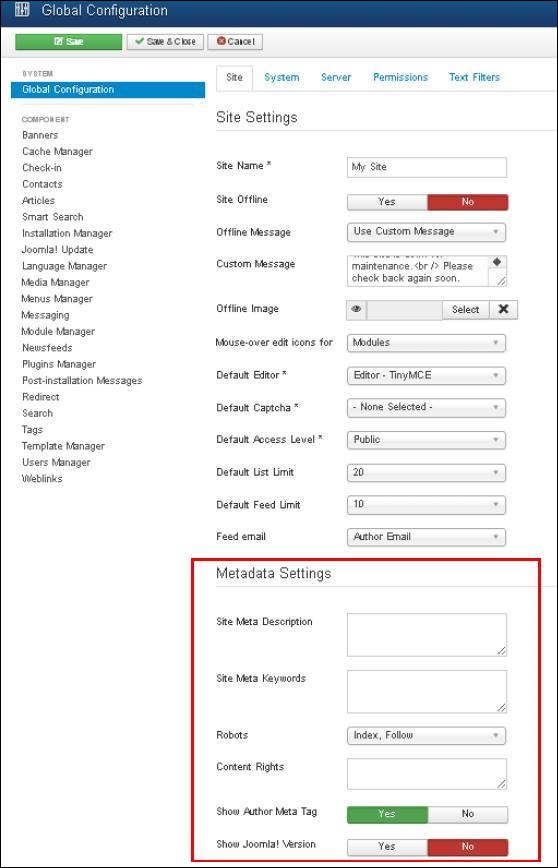
Step (1) − Click on System → Global Configuration in Joomla administrator. You will get the following screen.
Joomla Website Backup
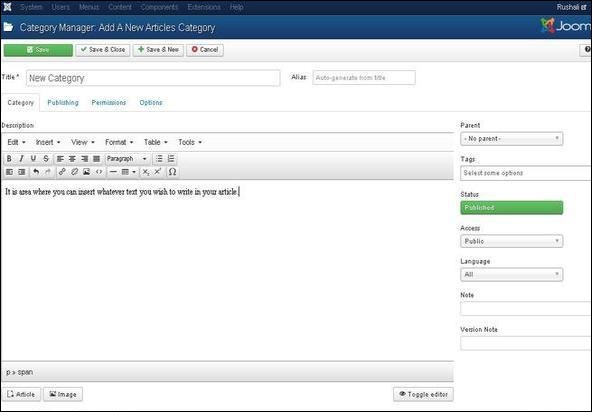
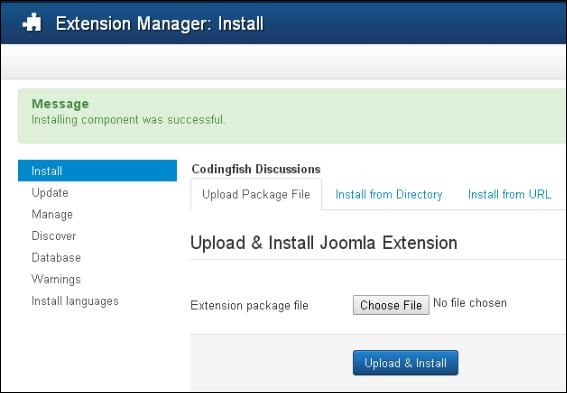
Step (2) − Next, click on EJB - Easy Joomla Backup at the left sidebar. You get a basic editor page for Joomla Backup. Here by default, the Componenttab is displayed.
Joomla Website Backup
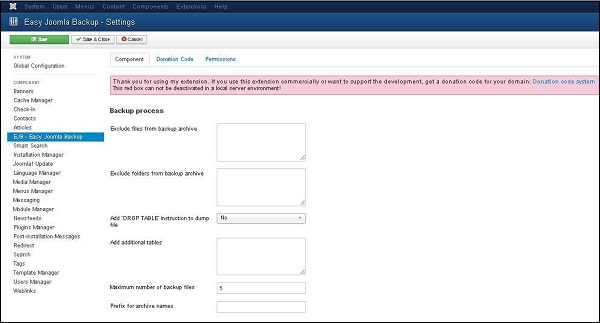
Below we have mentioned the details of the fields present in the Component tab on the page −
  • Exclude files from backup archive − It indicates the name of the files with the path address to be excluded from a backup archive.
  • Exclude folders from backup archive − It indicates the name of the folders with the path address to be excluded from a backup archive.
  • Add 'DROP TABLE' instruction to dump file − It indicates to add drop table instruction to dump files without deleting the tables by selecting either (Yes/No).
  • Add additional tables − It indicates to add additional tables, but it should not have the same prefix.
  • Maximum number of backup files − It indicates the maximum number of backup files.
  • Prefix for archive names − It indicates to use prefixes for archive names of backup file.
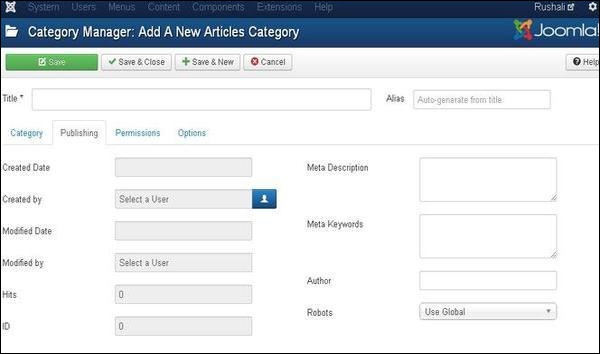
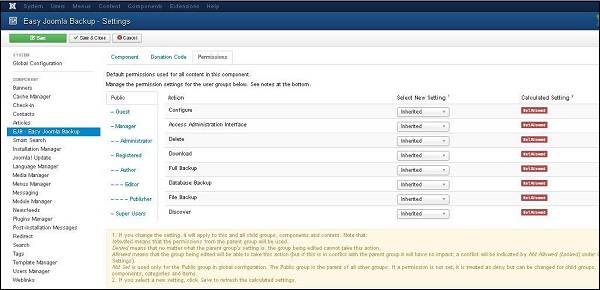
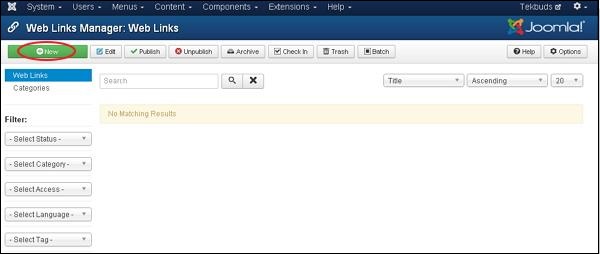
Step (3) − After clicking on Permissions tab, you will get the following screen.
Joomla Website Backup

Joomla Advanced - Website SEO

In this chapter, we will study about Website SEO in Joomla. SEO (Search Engine Optimization) is about optimizing a website for search engine. It helps search engines find and rank your site higher than the other sites in response to a search query.

Joomla Website SEO

Following are the simple steps used to set the Joomla Website SEO −
Step (1) − Click on System → Global Configuration in Joomla administrator. By default Site tab opens up as shown below.
joomla website seo
Following are the details of the fields present in the SEO Setting.
  • Search Engine Friendly URLs − Optimizing the URL's to the search engine.
  • Use URL rewriting − Selecting the server, which rewrites the URL's to meet a specific condition.
  • Adds Suffix to URL − Based on the document type the suffix to the URL is added.
  • Unicode Aliases − It selects between the transliteration and Unicode aliases.
  • Include Site Name in Page Titles − Provide your site name on all pages at the beginning or end of the page.

Toolbar

Following are the toolbar options in SEO −
  • Save − Saves your SEO Setting.
  • Save & Close − Saves the SEO Setting and closes the current screen.
  • Cancel − Cancels the SEO Setting in Joomla.

Joomla Advanced - Extensions Manager

In this chapter, we will study about Extensions Manager in Joomla. We can install different types of extensions to extend the functionality of the site.

Joomla Extensions Manager

Following are the simple steps used to set the Joomla Extensions Manager.
Step (1) − Click on Install Extensions option in Joomla.
Joomla Extensions Manager
Step (2) − Click on Choose File button and choose the extension forum which you have downloaded to include on your web site. Click on Upload & Installbutton.
Joomla Extensions Manager
Step (3) − Joomla starts installing the Forum extension for your site. After completing the installation, you will get the successful installation message as shown below.
Joomla Extensions Manager
Step (4) − It is also possible to install the extensions directly from the web, select the extension that you want to add on your website and click on Installbutton.
Joomla Extensions Manager

Joomla Advanced - Adding Web Links

In this chapter, we will study about Adding Web Links in Joomla. It allows you to insert, remove and edit the links to another webpage in Joomla.

Adding Weblinks

Following are the simple steps to add Weblinks in Joomla −
Step (1) − Click Components → Weblinks → Links in Joomla administrator. After clicking on Links, you will get the following screen.
Joomla Adding Weblinks
Step (2) − Next, click on New button, you will get the following screen.
Joomla Adding Weblinks
It is the basic editor page for the Web Link Manager. We have already explained about the editor in detail in the chapter Joomla - Adding Content. Here there are different tabs present. By default, the New Web Link tab is displayed.
  • URL − Enter the URL link, after saving, it gets converted to Punycode.

Joomla Advanced -

In this chapter, we will study about Plugin Manager in Joomla. It helps you enable and disable Joomla Plugins. This adds the unique features to an existing web site.

Joomla Plugin Manager

Following are the simple steps to set or edit existing Joomla Plugins −
Step (1) − Click on Extension → Plugin Manager in Joomla administrator as shown below.
Joomla Plugin Manager
Step (2) − After clicking on the Plugin Manager, an existing Joomla plugins will be displayed as shown below.
Joomla Plugin Manager

Toolbar

Following are the toolbar options in the Plugin −
  • Edit − Edit the plug-in.
  • Enable − Enable the plug-in to use on the website.
  • Disable − Disable the plug-in which are not necessary on the website.
  • Check In − Used to check in the plug-in and after completing the process displays the successful message.

Joomla Advanced - Adding Forum

In this chapter, we will study about Adding Forum in Joomla. We can install the forum extension in Joomla to share or discuss ideas and views on particular issues.

Joomla Adding Forum

Following are the simple steps used to set the Joomla Adding Forum.
Step (1) − Click on Install Extensions option in Joomla.
Joomla Adding Forum
Step (2) − Click on Choose File button and choose the extensions forum you have downloaded to include in your web site. After choosing the file, click on Upload & Install button.
Joomla Adding Forum
Step (3) − Joomla starts installing the Forum extension for your site. After the installation is complete, you get the screen below showing the success message.
Joomla Adding Forum
Step (4) − Click on Menus → Main Menu → Add New Menu Item option in Joomla.
Joomla Adding Forum
Step (5) − In Add New Menu Item page, specify title in the Menu Title. Click on the Select button to choose the Forum extension for your website.
Joomla Adding Forum
Step (6) − Click on the Discussion and choose the Discussion discussion index views.
Joomla Adding Forum
Step (7) − Open your website which contains the Forum menu as shown in the screen below.
Joomla Adding Forum

Toolbar

Given below are few details about the toolbars present in Forum.
  • Save − Saves your forums.
  • Save & Close − Saves the forums and closes the current screen.
  • Save & New − Saves the forums and opens a new create forum screen.
  • Cancel − Cancels the created forums in Joomla.

Joomla Advanced - Adding News Feed

In this chapter, we will study about Adding News Feed in Joomla.

Joomla Adding News Feed

Following are the simple steps used to add news feed.
Step (1) − Go to System → Global Configuration as shown in the following screen.
Joomla System Settings
Next, click on Newsfeeds option in Joomla Global Configuration. You will get the screen below and then select appropriate values.
Joomla Adding News Feed
Below we have mentioned the details of the fields present in Joomla adding news feed page.
  • Choose a Layout − It is default layout for items.
  • Save History − It saves the version history of the component when selected as Yes. Otherwise no version history is saved.
  • Maximum Version − It always saves the maximum number of versions for an item.
  • Feed Image − The Feed image is shown or hidden.
  • Feed Description − The Feed description is shown or hidden.
  • Feed Content − The content of feed is shown or hidden.
  • Characters Count − Displays number of characters per feed.
  • Feed Display Order − Displays the feed in order.
  • Image Float − Controls the position of the images.
  • Show Tags − The single category tags are shown or hidden.

Joomla Advanced - Adding Contacts

In this chapter, we will study about Adding Contacts in Joomla. It stores the contact details of the company.

Joomla Adding Contacts

Following are the simple steps used to set the Joomla contacts.
Step (1) − Go to System → Global Configuration as shown in the following screen.
Joomla System Settings
Next, click on Contacts in Joomla Global Configuration and you will get to see the following screen.
Joomla Adding Contacts

Joomla Advanced - Adding Banners

In this chapter, we will study about Adding Banners in Joomla. It displays the active banners and allows you to use different banners for advertising on webpage.

Adding Banners

Following are the simple steps to add Banners in Joomla.
Step (1) − Click Components → Banners → Banners in joomla administrator, you will get the following screen.
Joomla Adding Banners
Step (2) − Next, click on New button, you will get the following screen.
Joomla Adding Banners
There are different tabs present in above screen. By default, Details tab is active. This tab displays the details of the banner.
Below we have mentioned the details of the fields present on the Details tab.
  • Name − This block is used to write the name of the item.
  • Alias − This is auto generated from the given name.
  • Type − Displays the banner type i.e. image or HTML code.
  • Image − Displays the image file of the banner.
  • Width − Set the width of the banner image.
  • Height − Set the height of the banner image.
  • Alternative Text − It represents the alternative text to display on banner image.
  • Click URL − When user clicks on the banner then it will navigate to the specified URL.
  • Description − Brief description about the banner.
Following fields are present on the right side of the Details tab.
  • Category − It displays the category of the banner.
  • Status − It displays the status of the banner such as Published, Unpublished, Archived and Trashed.
  • Sticky − It displays whether the banner is Sticky or not. For that we have to select either ( Yes/No ) button.
  • Language − It displays the specified language of the banner.
  • Version Note − It displays the version of the items on the banner.

Joomla Advanced - Article Metadata

In this chapter, we will study about Article Metadata in Joomla. Metadata describes details of the article in short. It makes it easy to work with a particular data.

Joomla - Article Metadata

Following are the simple steps used to set the Joomla article metadata −
Step (1) − Go to System → Global Configuration as shown in the following screen.
Joomla System Settings
Next, click on Global Configuration, you will get to see the following screen. Fill the fields with appropriate values.
joomla article metadata

Joomla Advanced - Formatting Content

In this chapter, we will study how to format content on the Joomla website.

Formatting Content

Following are the simple steps to format content in Joomla −
Step (1) − Click on Article Manager in Control Panel as shown below.
joomla Formatting Content
Step (2) − Select the article to be formatted by clicking on the checkbox. Next, click on the Edit button as shown below.
joomla Formatting Content
Step (3) − Next, the article opens up for editing as shown below. Here we are aligning the heading Apple in center using center alignment. Similarly, you can edit the image alignment, font size and so on. You can study about the editor in detail in the chapter Joomla - Adding Content.
joomla Formatting Content

Toolbar

Following are the toolbar options −
  • Save − Saves the contents and stays on the same screen.
  • Save & Close − Saves the content and closes the screen.
  • Save & New − Saves the content and opens a new content page.
  • Save as Copy − Saves the formatted content and copies it.
  • Versions − It is used to select versions of the page.
  • Close − Closes the article without formatting.

Joomla Advanced - Adding Content

In this chapter, we will study how to add content on the Joomla website.

Adding Content

Following are the simple steps to add content in Joomla.
Step (1) − Click on Content → Article Manager → Add New Article as shown below.
joomla Adding Content
Step (2) − After clicking on Add New Article, you will get the editor page of the Article Manager as shown below.
joomla Adding Content
Following are the details of the fields on editor page of the Article Manager.

Title

joomla Adding Content
  • Title − It is used to write the title of the article. This title gets displayed on the page.
  • Alias − It is auto generated from the given title name.

TinyMCE editor

It is a WYSIWYG Editor, which is similar to a word processor interface where we can edit the contents of the article.
joomla Adding Content
First Row − They appear on the top of the Editor page and contain a group of related commands.
  • Edit − Undo, Redo and Cut, Copy, Paste, Select all.
  • Insert − Insert image, Insert link, Horizontal line, Special Character.
  • View − Visual Aids.
  • Format − Bold, italic, underline and various formats are available in this group.
  • Table − It is used to display the table format in the article by using row and columns.
  • Tools − It displays the source code of your article in html format and the code will be displayed in a new popup window.

Joomla Advanced - Category Management

In this chapter, we will study about Category Management in Joomla. Category Manager is used to create categories for the article which allow grouping your content better.

Category Management

Following are the simple steps to add new category manager in Joomla.
Step (1) − Click on Category Manager in Control Panel as shown below.
joomla Category Management
Step (2) − After clicking on a Category Manager, you will get the following screen.
joomla Category Management
Step (3) − Click on New button in the above screen. Following is the basic editor page we get for category manager. This editor is explained in detail in the article Joomla - Adding Content. Different tabs are present on this page. By default, the Category tab is displayed.
joomla Category Management
Step (4) − In Publishing tab, it gives the information of Joomla category.
joomla Category Management